
Actually, almost all leather is split, or leveled, in order to get it to a pretty much uniform thickness. When you split a piece of leather, you end up with (usually) 2 pieces. The top part which has the grain on it, and the bottom part which is referred to as the “split”. If the split is heavy enough and good enough, you can actually finish it and end up with what is called a finished split. As far as the cost goes of splitting leather, there would be a number of details that would have to be provided first. Some leathers are quite easy to split, and some are not. Some leathers can’t be split. You’d really need to talk with us before we could help with a price. Call us at 800-668-8518.
I posted a few days ago about dyeing and finishing one of your veg tan splits 5×10 I bought from you guys. Well, the tooling is done and no response. Help me out here.
I thought someone had helped you out already! Regardless, as you might imagine, dyeing and finishing a split is a bit different from smooth veg. I’ve done it in a number of ways, and been pretty successful. You can oil it first, and let it dry. That, in itself, will darken it and could be an end result if you like it. After it dries, you could put any sort of stain over it, such as Hi Liter, Goof Proof, or Fiebings Antique Stain, wipe the excess off, and that will look pretty good as well. Using sheepwool to apply those works better than a sponge, rag, or a dauber. You can spray with masters quick shine after drying. You can also airbrush it with regular dye if you wish, and finish with Masters QuickShine. Dyeing with regular dye using a dauber is usually not happy.
Hope this helps a bit!
I have a purse made of soft leather, not suede. I purchased it from Duluth Trading. I would like to know how to clean it. I realize that leather wears according to usage, however, I would like to clean my purse from time to time, due to daily use. What do you suggest I use to clean it? Thank You for your time.
We use either of two products. Lexol leather cleaner, or Bic 4 leather cleaner. Personally, I like the Bic product. It does a good job. You shouldn’t need to use it except for maybe every 6 months, or even once a year.
Paint, Dye or Paste?
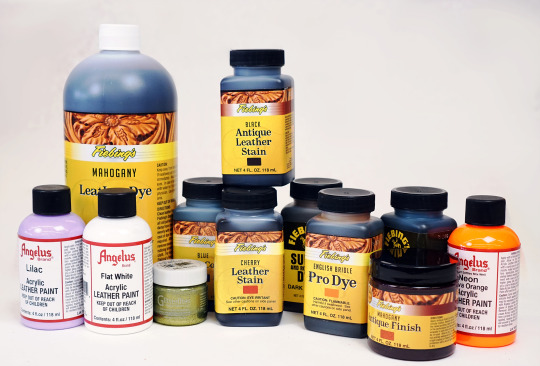
There are lots of ways to customize your leather with color! Some of the most popular ways to do it are painting, dyeing, and antique pasting. Of course, we’ve talked about paint, dye, and other coloring methods on the blog before but they’re not quite like this. Here, we’re bringing together just about every stitch of information on dyes, paints, stains and pastes that we have on the web!
Dye
Dye is a popular and permanent way to transform your leather. It is fairly easy to apply and gives a rich and even color to leather of your choosing. We have a wide array of leather dye available on our website. There is standard, low VOC dye, then there’s oil dye (Denny’s favorite) that can be mixed or thinned with oil to condition your leather while you color, there’s also suede/rough out dye that is ideal for the textured and porous surface of suedes and leather splits, and, finally, water-based dye that is safe for kids to use and not flammable.
Note: Denny has tried using oil dye on suede and it went over terribly.
The important thing to note about dye is that it will always make the material you started with darker. You cannot use dye in a vibrant color like green and expect it to lift the overall brightness of your piece. It will add some darkness while changing the hue. Dye is a permanent, so you want to be very careful and confident when you use it. Dye is also buildable if you thin it. Once dye is on, you can’t lighten or lift the dye as it does penetrate the fibers of your leather. However, if you’re worried that your project turned out too dark, let it dry before you chuck it in the bin! It will lighten some as it dries.
Learn more about using dye with Rusty and Kevin below!
Stains and Antique Paste
Stains and antique pastes are a favorite among toolers like Denny. Antique paste and stains allow you to add depth and color to your project without drastically changing the look of your leather…unless you want to. Antique pastes and stains tend to be earth tones and reds. The color change for stains and antiques is considered permanent as the stain will penetrate the fiber of the leather. It is oftentimes used in conjunction with resist to lessen the intensity of the color and allow for easy wipe off. It is ideal for embossed and tooled leathers, but can be used on smooth surfaces just the same. The main difference between the two is the consistency, though you will also get different color results. Stains are liquids while antique pastes are, well…paste! The color of these are somewhat buildable. The longer you allow antique paste to sit and dry on your surface before you wipe it, the richer the color you get.
Learn more about antique paste in these videos
Paint
The best paint for leather is acrylic paint. Acrylic paint comes in the widest array of colors we have available and features different finishes as well. Paint can be long-lasting but is not considered permanent like dye or stains. Paint generally will sit on the surface of your leather, but if applied correctly and given time to dry properly it can last for years to come without cracking or peeling. Paint is a popular way to transform the color of sneakers, but it is also a way to add vibrant designs to projects of any kind. In short, the best way to ensure you get the most out of your paint is to use thin coats that are allowed to completely dry between applications. Paint can be removed after it is applied, especially when wet, but that removal may prove difficult if you let it dry as it is acrylic paint.
Watch the video below for even more useful information about using paint with Rusty!
As you can see, there are a lot of ways to change your leather after you get it home and experimentation is key. Be sure to keep your scrap leather in times like these! If you’d like to see the videos above and maybe a few we didn’t include here, be sure to check out our Dye, Stain, Paint playlist and subscribe to our YouTube page to see new videos. If you have a specific question about paint, dye, stains or antique paste, be sure to search the blog for any of those terms, check out our Ask Kevin questions or ask your own here. Until next time!
I have a customer that wants the gold star with black background Army Emblem put on a holster. Will the Angelus acrylic paint hold up and not wear off? What kind of finish would you recommend to protect it? Do I paint the emblem on first and dye the holster brown around it? Any help would be greatly appreciated.
You’re not going to have much choice outside of Angelus, when it comes to the gold. Dye the holster first, and make sure you get all the excess pigment removed. Then do the painting. Any sort of paint will be subject to abrasion, but the angelus is formulated for re-dyeing shoes, so it will be about the best you can do. You can add Angelus Acrylic Finisher or use your sealant of choice.