How to Make a Journal Cover

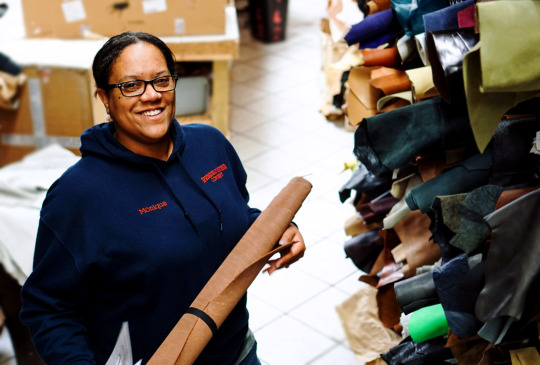
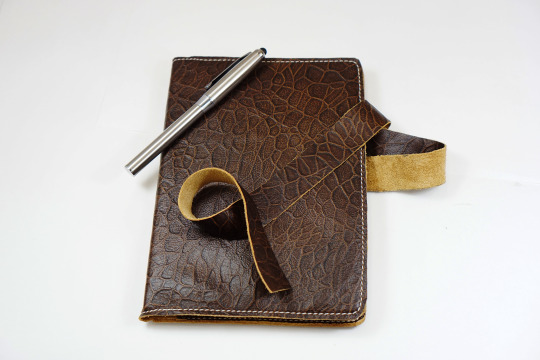
Why not slip your journal into something more durable? Get a leather covered journal, or any book for that matter, by following this simple guide to journal making. If you’re familiar with our YouTube channel, then you’ve likely seen the video we posted a few days ago about making one. Tonya, the star of the video, makes all of the covers for SLC and can make one in as little as 30 minutes. That’s why she is sharing with you the simplest way to make a cover with the most basic supplies. 

Keep reading to check out Tonya’s instructional video and a text version of the instructions below! 

image


As gift giving season approaches, lots of crafters are looking for good items to sell and journal covers are one of our favorites. These covers are the perfect project for those looking to make something simple, practical and unique. If you have minimal leather crafting supplies, this is the project for you! 

What you’ll need: 
Please note that links will be SLC products that are recommended, but that doesn’t mean it’s the one you have to use! For example: if we link to white thread, that doesn’t mean you can’t use thread of another color. Or maybe we linked to a different brand of contact cement than you prefer. Take a look arounf the site, we tend to have more than one variety of each item. Links are meant to be a guide! What your project looks like in the end should always be up to you.  

  • Journal – whatever style or size you prefer is fine. Just consider the stiffness of the covers when you work on the leather pockets. 
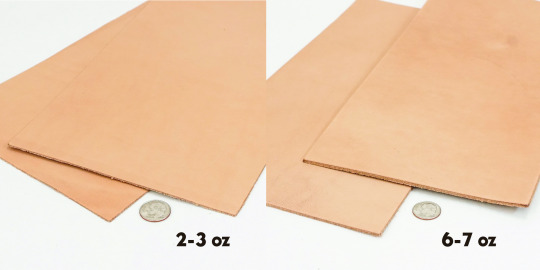
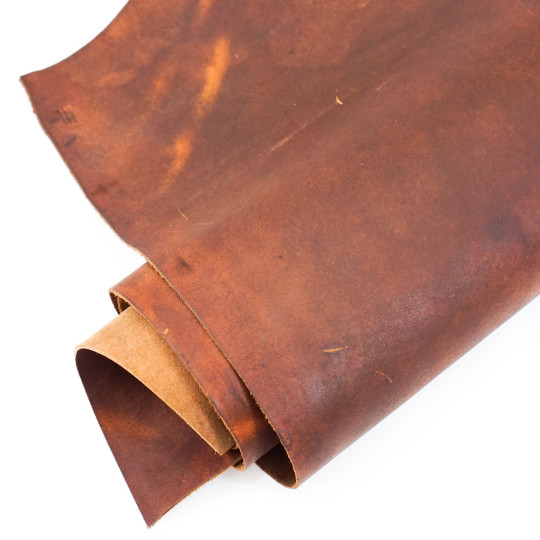
  • Leather – we recommend light to midweight leather (2.5 – 6 oz.) 
  • Shears or a utility knife – you want to make sure your scissors will cut through the leather without messing up your edges. If you’re unsure about your scissors, test them out on a scrap piece first. 
  • Wing Divider 
  • Contact Cement 
  • Ruler/Square – a square is optional but will make your job easier
  • Pen – we used a gel pen, but you can use anything that will show up on leather
  • Sewing supplies: 
    • Awl/Waxed thread and needle
    • Leather sewing machine with nylon thread – you don’t want to use a standard sewing machine on leather. It will not go well. 

Let’s get started: 

Watch the video below for instructions, tips on sewing and to watch Tonya make one herself! Check below the video for written instructions. 


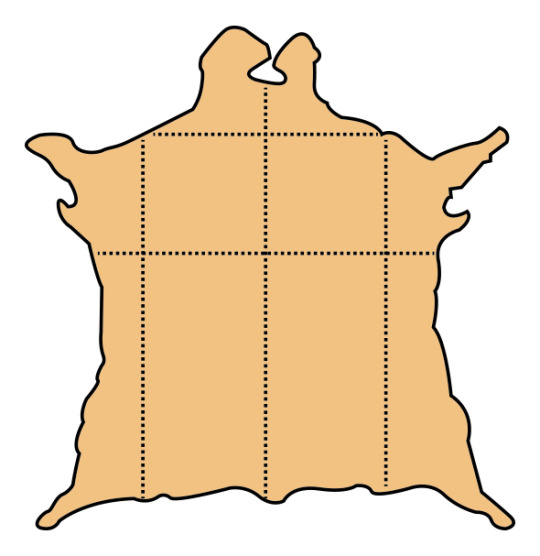
Step One – Laying Out the Leather 

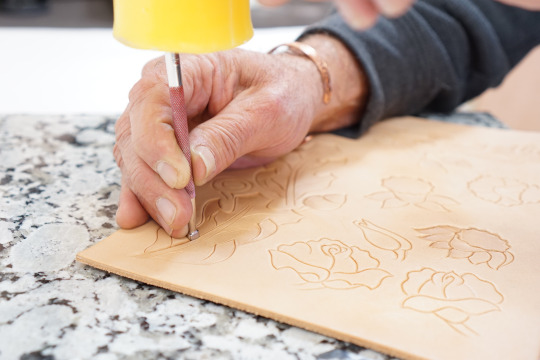
Lay your leather onto a flat surface with the finished side down. Place your journal onto your leather and ensure you have enough material to cover both sides of the book and the spine. If your leather has a pattern or grain, now is the time to consider how you would like it to look on your cover. If you plan to do any decorating on the leather, save that part for later.

image

Step Two – Create a Pattern

You have your piece and now it’s time to create guides to cut. Use a winged divider or other tool that will create a clear indentation in the leather. A winged divider is ideal as you can trace the shape while creating space between the journal and your markings. You’ll need some extra space around the journal, so if you plan to use something aside from a divider, keep that in mind. Something less than a centimeter will work fine for a journal with thin covers like ours.

image

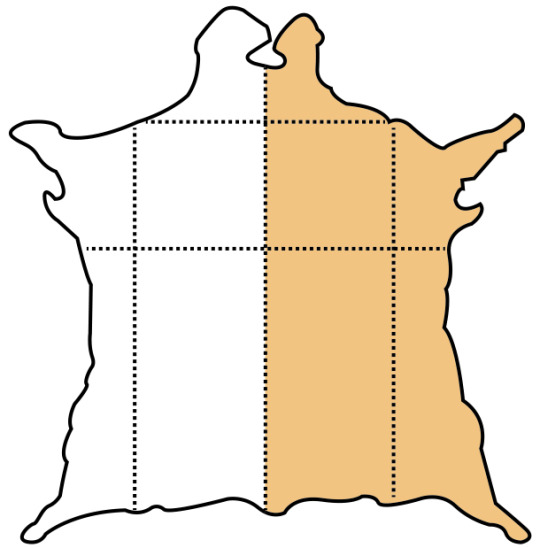
Step Three – Cut it Out 

You can use leather shears or a utility knife to cut out the cover. If you decide to use scissors that are not shears, test them by cutting a scrap piece of leather to ensure it won’t fray your edges. An x-acto knife is an acceptable utility knife to use. Just be sure the blades are sharp! You can always clean up your cutting later and you’ll likely have to do a bit of trimming when we get to the pockets so don’t worrying about it too much. Get it as clean as you can in one go and move on.

image

Step Four – Create Pockets & Strip

After testing the fit of your journal and the leather you’ve just cut out, it’s time to make the pockets that will secure the cover to the journal. Measure the covers of your journal and subtract at least one inch from the width. The amount you will need to take from the width will be dependent upon how stiff your journal covers are. Covers that won’t bend much will likely require more space. Try clamping the leather together to test it out. 

Once you have your dimensions, grab another piece of leather and a ruler. 

image

Use a pen to mark the dimensions off on your leather. If you have a square, it will help you make sure that all of your lines are straight as they relate to each other. You don’t have to use a square, but it will save you some time. 

Once you have your pockets drawn out, cut them using the same shears or utility knife from step three.  

While you’re in the cutting mood, find a piece of leather that is long enough to wrap around the journal and tie! We used a piece that was six inches longer than the width of our journal. Our strip was one inch wide. You can also skip this step if you don’t want a strip to keep your journal closed. 

Test your pockets out by placing them on your cover. Make sure they’re inside the lines you have marked and that they’re as even as possible. If you have any trimming to do, now is the time. 

Step Five – Secure your pockets 

Use contact cement on three edges of each pocket, leaving one log edge open for the journal to slide in. Apply contact cement to the journal as well for extra hold. This will be especially important for those who are hand-stitching. Try not to go too wild with the glue so that it’s still easy for you to push a needle through. 

image

Place your pockets on the cover. Be sure to have the finished side of the leather facing you. We used a ruler to make sure that the pockets are resting on the cover evenly.

image

Step Six – Add your strip 

If you’d like to have a strip of leather secure your journal, it is time to add it to the cover. Apply glue to one end of the strip on both the finished and unfinished sides. Create a small hole between one of your pockets and the cover and place the strip inside. Have the unfinished side facing up. 

image

Step Seven – Time to sew! 

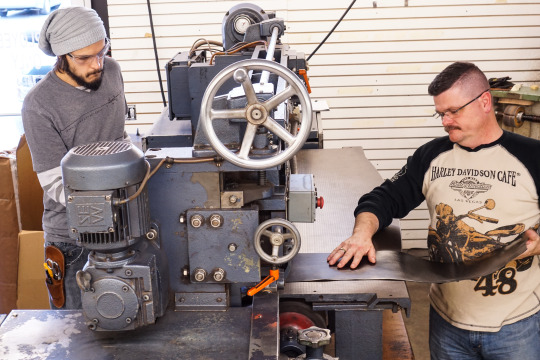
Now it’s time to put it all together. As we’ve mentioned before, you can do this with a machine or by hand. Please note that using a regular sewing machine on leather will likely cause damage to your needle, if not the entire machine. We do not recommend using standard machines on leather, especially thicker leather. The same goes for hand stitching – using a normal fabric needle and thread are not your best options. 

As far as leather sewing machines, the machine you should use depends on your leather and sewing needs, but just about any leather machine will do as you will not likely be using very heavy weight leather. We used a Cobra Class 20 and #69 nylon thread

For additional sewing tips, we recommend checking out the video at this time stamp. Tonya talks you through testing your machine settings, getting around corners and securing your strip. 

For hand-stitching, we recommend waxed thread and leather needles. Sizes to be determined by you! If you’ve never stitched before, we offer detailed hand-stitching instructions for purchase or Denny will show you how for free on our YouTube channel. 

Step Eight – Try it out! 

Your journal cover is complete. Slide your journal in and see how it’s fitting! Make your final snips, burns and adjustments. 

image

A Full-Time Life | An SLC Profile with Monique

As SLC enters the busiest season of the year, Monique is stepping up to the plate for her greatest challenge yet: a new position. Newly dubbed our Office Coordinator, Monique is the maestro of office training, customer service savant, federal order virtuoso, return steward and an expert dabbler in of a little bit of everything. 

image


Monique joined SLC’s Billing team two years ago. She said, “It was a random application and they decided to take a chance on me. It kind of progressed from there – as I got comfortable with SLC, SLC got comfortable with me.” 

That’s not all that Monique had to get comfortable with. She says the most challenging part of her job is trying to get everything done by the end of the day and accepting that it’s not always possible. 

“When I first started my desk was clean. There would be nothing around for the next day. I don’t like leaving things behind. If I could stay all night to finish it, I would. I try to have it all finished in one day, knowing that I won’t have it all finished…but trying my best.” 

The transition to her new position has added another layer to that ambitious goal: not letting things fall behind as she manages even more tasks than before. 

image

She says that aside from seeing Rusty every day, her favorite part about work is simply being here. “Work to me is vacation,” she said. With two teenagers she has plenty to handle after she clocks out. While she is grateful to be spared from teenage requests for a few hours each day, she is even more thankful for the opportunity to pursue what she loves. “I am fortunate to do this because my husband was injured in the military and he stays home with the kids.” 

Monique is a self-proclaimed boring person who appreciates the simple things in life. 

“These days, I just enjoy quiet. You’re at work all day, talking to people all day, and then you go home. I work full time, I’m a mother full time, a wife full time, a daughter in law full time. I used to be cooking and reading and now I just wanna watch stupid TV and enjoy quiet.” 

Monique isn’t much into leather craft, though she is one of the best at finding you what you need to get your project complete! She takes pride in being able to help customers, prioritize her family and rock this new position. 


If you’re interested in doing business with Monique, just give us a ring! You can order items over the phone using our website or catalog as your guide. She’s also here to direct your calls to anyone you may need advice from – she’s just that good! 

A Pretty Rockin’ Time | An SLC Profile with Cori Edwards

The mail order and gathering departments are bustling segments of SLC that are so busy, they need three supervisors. Meet Cori, one of those awesome supervisors, order coordination master, training virtuoso and keeper of BIN locations! 

image


Cori started with SLC by applying for a marketing job. Though she didn’t get hired for that gig, she seemed a great fit for our hardware gathering department. Two years went by and she’s doing much more than that now. 

In addition to coordinating orders by separating and organizing them, managing back orders, getting locations for stock items and adjusting orders, she’s also “…responsible for training our new gatherers to use Netsuite, gather orders efficiently and accurately, and also incorporate our company’s culture and personality.” 

With all of that on her plate, she still manages to keep up and even solve problems for the department. 

“My challenge is definitely getting problem items on orders taken care of and intercepted fast enough. It’s something that’s always a challenge and we’re really working hard to create a faster flow,” she said. 

While that part may be tough, she loves the challenge and attributes her ease of mind to her coworkers. She said, “My favorite part is definitely the culture here and the people that I work with.” 

image

While she is well-versed in Springfield Leather products, she isn’t much of a crafter these days. When asked if she does leathercraft, she said, 

“I am inspired by it and I used to feel like I was pretty crafty but coming into a work environment with people that are much craftier than I am, I wasn’t even at a level close. I think it’s inspiring and I love seeing what other people can make.”

Instead, she focuses her attention on another kind of art. “I’m a musician and I go home and write music. That’s my side of the brain that I feel more confident in.”

Cori plays the cello and provides some vocals for her band Kill Crows.

Cori says that the band is in the finishing stages of an album. Their music is a mix of folk, country, gospel and punk rock. “It’s definitely a hybrid crazy combination but it’s pretty rockin.” We could say the same about Cori and her job. It’s a big mix of responsibilities, but she rocks it! 


If you’d like to do business with Cori, just place an order with SLC! More than likely, she’ll have a hand in getting it to you. 

Basic Leather Terminology

So, you’re interested in buying leather. The leather world isn’t hard to get into to, but there ’s a certain manner of speaking that might throw you for a loop. Here’s a quick cheat sheet of terms to get you started. It will also help you understand some of our instructions a bit better.

 Excuse the mess, this list is still growing! We’re getting some awesome visual aids together to accompany these definitions, so be sure to check back in on this list in the future! 


Hide – a leather hide is the whole of an animal’s skin. So, if we’re talking about a cow hide, it’s the full amount of leather that could come from one cow. This hide is then commonly cut into pieces that are characterized by the part of the cow. Be sure to view the chart below for visual help.

image

Side – a side of leather refers to one side of the hide; half of a vertically cut hide. 

image

Neck – not commonly sold alone, the neck is the skin from a cow’s neck. 

image

Shoulder – one half of the topmost quarter of a hide. So named because it is the skin from a cow’s shoulders. Includes the neck, part of the belly and, of course, the shoulder. If you purchase one side, you will get one shoulder. 

image

Also sold as a double shoulder, as seen below. 

image

Belly – also included in a side, the belly is the outermost portion of a side identifiable by its irregular edge. Belly leather is where you will notice wrinkles and less consistent leather. The inconsistent parts are often called flanky, they will be porous, stretchy and not great to work with. Bellies are cheaper than other cuts of leather and are a great way to try out a piece of leather you’re unsure about. It will certainly have some pieces that are not usable, but make great test piece for dyes, paints and tooling. With all of its potential for fault, bellies still have plenty of usable leather. You can easily get great small projects and even a belt or two out of a belly. The leather is the same grade as the rest of the hide, it just has more waste than you would get from other cuts.

image

Back/Bend/Butt – this the prime real estate of a side. There is a bit of inconsistency about what these pieces are called, however, each name has its meaning. 

The back, sometimes referred to as the bend, is comprised of the all parts of a side, not including the belly.    

image

The lower 60% (toward the back of the cow) or so of this piece is often called the bend or the butt.

image

 Culatta – the bend of the hide + corresponding belly. 

image

Tanning – there is a lot that goes into getting leather from simple skin to finished product. That process includes splitting, skiving, cutting and more! Tanning is the process that turns skin into leather the way that we know it. It gives it its color, its feel and overall look. There are myriad methods of leather tanning, but are most simply classified as vegetable tanned or chrome tanned. In short, vegetable tanned leather is great for tooling and has a more natural look, usually tan/light brown. Chrome tanned leather is much more varied than vegetable tanned leather. Most leathers on the market are chrome tanned in every color, pattern and print imaginable.  

Hand – A word that describes the feel (i.e. softness or stiffness) of leather. 

Grain – A word used to describe the natural texture of the leather like pores, winkles and markings. This term can also be used in conjunction with embossing, in which the original grain layer has been removed: embossed grain.  

Drawn Grain – Leather with a shrunken, shriveled or wrinkled grain. 

Full Grain – The outside of original skin or hide that has had the hair removed, but has not been corrected or altered beyond hair removal. Full grain leather retains all of the original texture and markings of the hide. It is the highest quality leather and, often, the most expensive leather you can buy. 

image

Weightthe thickness of a piece of leather. Weight is measured in ounces that can be converted to inches and millimeters. Example: 1 ounce is equal to .016 (1/64th) inches or .40 millimeters. Leather is a natural product, so it will never be totally uniform. Leather weight is generally expressed as a range because of that. Ounces are a simple way to share that information without having to be too specific about the numbers. You will commonly see specific projects being suggested based on a leather’s weight.

image

Splitting – skin is thick! A lot thicker than you might think. The leather that you favorite jacket or seat is a lot thinner than how it comes off the cow (or other animal). Splitting leather is the process of decreasing the thickness or weight of the leather. 

image

 Skiving – similar to splitting, skiving is reducing the weight of the leather. The difference between the two lies in the method and scale of this thinning. Generally speaking, when someone is talking about skiving they are doing it by hand, while splitting is mostly done with a machine. Skiving is also generally done on a smaller scale – you’ll skive a project but you’ll split a full hide or side. Projects are often skived to shape leather or even out a piece. Generally speaking, the two are interchangeable, but each comes with its own connotation. 

image

Grading – a scale for assessing the quality of a piece of leather. As we’ve mentioned, leather is a natural product and some animals yield more favorable skins. Grading is a simple way to quickly identify the value of a piece of leather. Though is it not standardized, the basic idea is that higher grades are given to the best leather in a tannery at a given time. You’ll see things at SLC graded using a letter system similar to ones used in American schools. There are those who use a scale that includes AAA, AA and so on, in addition to those who use a number system. Grading can be complicated to understand because everyone’s system is different, but one thing remains true throughout: no piece of leather is perfect, so top marks doesn’t mean a piece of leather is without a few imperfections, especially keeping in mind that grading is relative to the rest of the leather that is around at the time of grading. 

Tooling – you’ll hear this term come up a lot when discussing vegetable tanned leather. Tooling is the art of creating patterns in leather using stamps and other tools. The idea is to push designs into the leather much like wood carving. Tooling leather takes a bit of practice, but includes lots of aids like stamps and patterns. 

image

Tooling Stamps – tooling stamps work much like regular rubber stamps, only instead of using ink to lay your design on top on the material, you use a mallet to impress your pattern into the material. Stamps make design simpler to execute and take a lot of the guess work and chance out of a design.

image

Pull-up – Describes the behavior
of leather that has been treated with oils, waxes and dyes in such a way that
when the leather is pulled or stretched the finish becomes lighter in the
stretched areas.