
Have you ever wondered what makes a leather business work? Join Kevin, Rusty and Denny as they discuss what makes a business stick. From best practices to prolific advice like, “Don’t do stupid stuff,” these three have some basic tools to share with you.
Wanna see the gang? Head on over to our YouTube channel to see the video version of this episode: www.youtube.com/watch?v=Zabnyq6Duvw
All three work at Springfield Leather Company in Springfield, Missouri. Stop by and see us in-store or online at springfieldleather.com or check out all of our links on soundcloud: soundcloud.com/
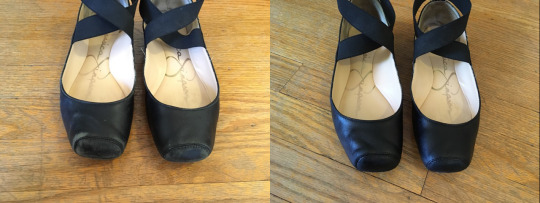
This Easy Scuff Fix Will Make You the Belle of the Ball
Hello everyone! We’ve told you a lot about leather, how to buy it, how it’s graded and even how to make stuff with it, but we haven’t told you a thing about caring for it or restoring it. In this quick how-to, we tested
showroom associate
Jeff’s quick fix for scuffed leather.
What You’ll Need
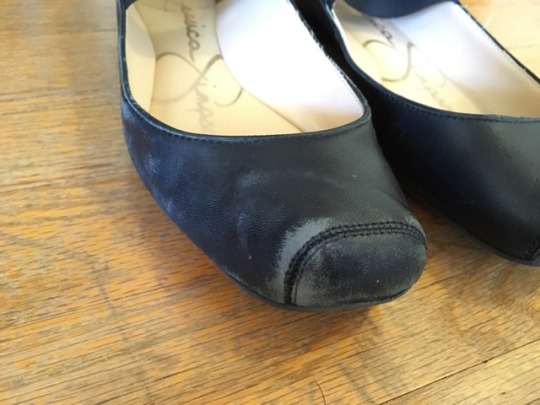
– Scuffed leather – we used shoes
– Leather Conditioner – we used Bick 4 Leather Conditioner
– Leather Dye – we used Fiebings Leather Dye in USMC Black
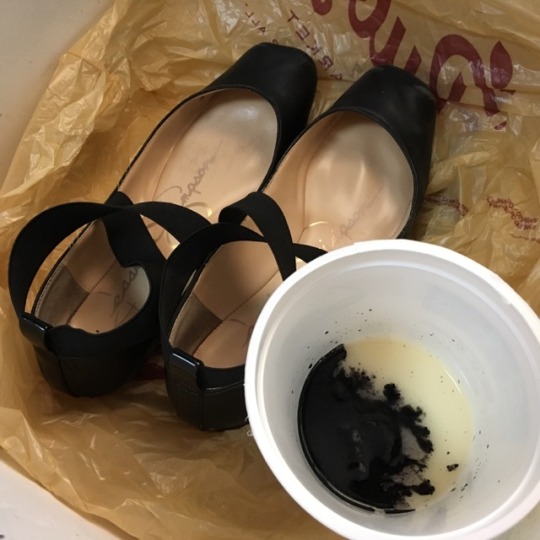
– Paper, plastic or a surface that you can get dirty with dye – we used a plastic grocery bag
– Syringe – no needle required!
– Container for mixing
– Gloves and/or dye applicator – we used gloved hands
– Soft cotton cloth
Prep
Prepare a work space that can get a little dirty. We just used a plastic bag big enough for our shoes. If your project is a bit larger, you may want to lay out paper or go outside. You’ll also want to start off with your gloves on. Prep is totally optional though, if you like the dye a lot, why not spread it around? 😀
Let’s Get Started
Mix the dye
In a container, mix dye and leather conditioner. We used 1/8th cup of leather conditioner and 12 drops of dye (roughly a teaspoon). Essentially, you’re tinting your conditioner because your shoes need the TLC. If your piece needs more pigment, add more dye! The big idea here is that you want more conditioner than dye and if you use Fiebings, a little goes a long way.
Apply the dye
You want to carefully apply your mixture to the desired areas. We used gloved hands to apply the paste and gently rub it into the material. You want the conditioner and pigment to penetrate the material but you don’t want to soak it. If you only need a bit, an empty travel-sized spray bottle is a fine way to dispense and store your mixture.

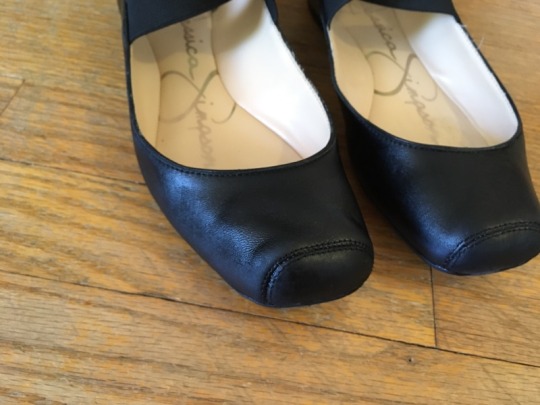
Let your mixture sit on the material for at least one hour.
Buff away any excess conditioner with a soft cotton cloth and you’re all done!
Buffalo v. Bison
Buffalo is a relative term. Learn all about the difference between buffalo and bison and, of course, about their leather.
Buffalo in America
In the US, when we hear the word “buffalo”, we tend to think of American bison. American bison, or buffalo as they’re often called, are widely believed to be extinct. The status of these iconic animals is actually near threatened. Over-hunting and habitat loss due to farming and ranching in North America has caused an extreme drop in their population over centuries. The numbers have slowly risen over the years and the endangered status has since been changed. Bison are still very much alive and we do get leather from them, albeit much less than water buffalo and with more regulation.
Buffalo in the Rest of the World
If you say buffalo anywhere else in the world, more minds would likely envision actual buffalo. Buffalo roam in Asia, Africa and Europe. With two main species hailing from Africa and Asia, kinda like elephants!
Asian buffalos (Bubalus) are most commonly known as water buffalos, while African buffalos (Syncerus caffer) are called cape buffalos. While there is some variety in the Bubalus genus, in the leather world, we tend to focus on domesticated Asian water buffalos (Bubalus bubalis). Why? Well, because water buffalo are domesticated, much like cows – our most common source for leather.
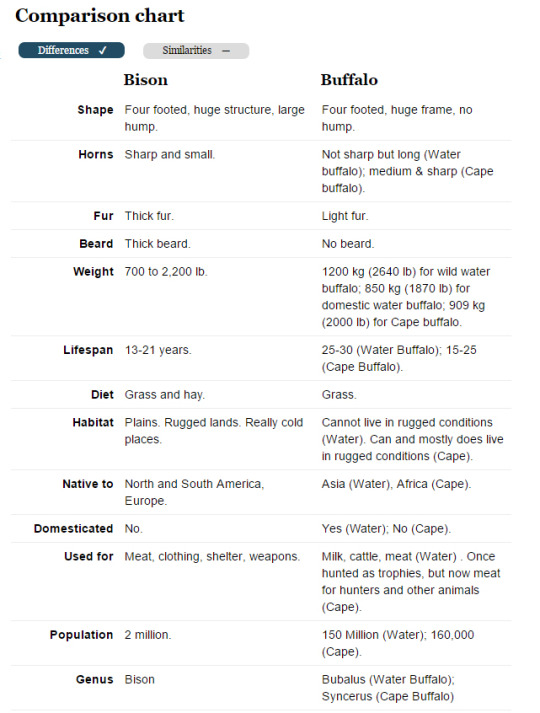
Similarities
Oddly enough, even though these animals are all called the same thing, there is an immense amount of variety in their shared tribe, Bovini. Beyond that, they really don’t have much in common! Check out the chart below to see side-by-side differences between buffalo (water and cape) and American bison. A chart of what they have in common wouldn’t be worth looking at.
Let’s talk about Leather
In the leather world, oddly enough, when you search for buffalo leather, you’ll see a lot of information on bison, even though bison leather is not as readily available as buffalo leather.
Below, we’ll give you some information on both kinds of leather, but here’s a tip: if a listing you’re viewing doesn’t mention North America or bison, it’s probably a listing for water buffalo.
Buffalo Leather
Bison leather isn’t impossible to find, but when you see listings for buffalo, more often than not, you’d be getting Asian water buffalo. Not only are they more easily accessible, but they are much more densely populated and yield just about as much product as bison. In some cases, Asian water buffalo even outweigh American bison.
Buffalo leather is known for its durability and relative flexibility. It is also lauded for its tear and abrasion resistance. Buffalo is sometimes chosen over cow leather because of that strength, especially for jockeys. Buffalo has stretch similar to cow leather (sometimes a bit stretchier) and is well-suited for projects you would generally use cow leather for.
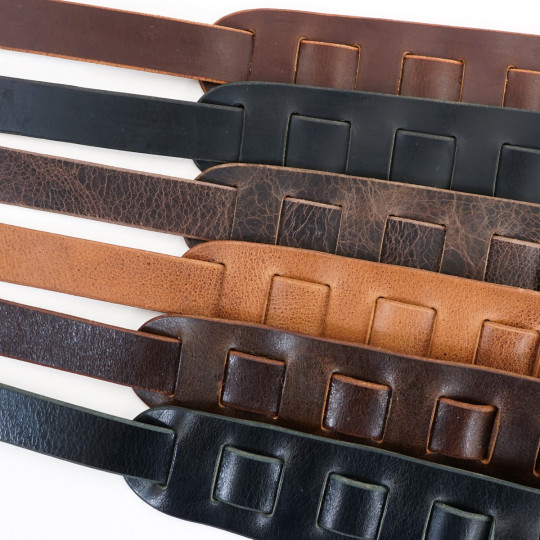
Some people believe that buffalo leather isn’t any good, but that is heavily dependent upon the tanning – just like with cow leather. Since water buffalo is a little easier to come by, you may have a higher chance of running into low quality buffalo than bison, but that’s what we’re here for! We certainly aren’t in the business of buying things that won’t sell, and if you can’t use it, it surely won’t sell.
Tooling
Tooling on water buffalo is possible, but not recommended. Cow hide reigns supreme in this regard.
Bison Leather
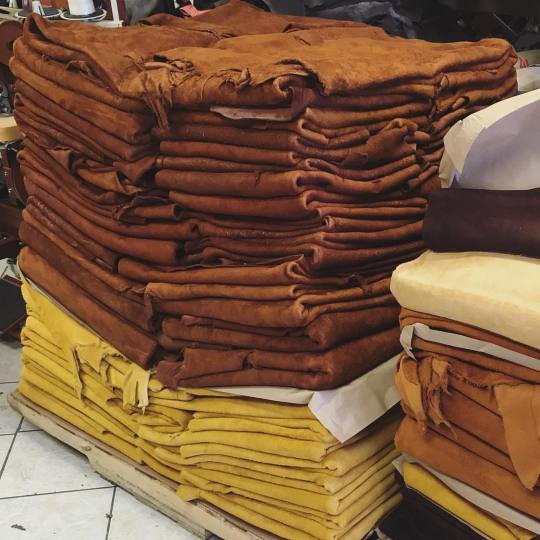
Bison leather is revered for its soft, tough and stretchy nature. Many bison leathers are brain tanned, while others are chrome tanned. All are soft and perfect for adding a rustic feel to projects. The leather is pretty soft and floppy, so it’s not a great candidate for projects that require structure. For example: a purse that needs to stand up without hardware – it just won’t do it.
This is chrome tanned bison. Note that it is still supple and stretchy!
Bison are wild animals, so they tend to have more natural character to their hides than buffalo do. Bison leather is easily identified by its naturally wrinkly texture that tends to show up deeper (or coarser) than buffalo wrinkles.
This leather is very soft and will likely be stretched when measured, so don’t be surprised if you receive a side that looks a little small. You can get rid of some of the stretchiness by spreading your bison leather over plywood and spraying a solution of water and denatured alcohol (50/50) onto your leather.
There is also shrunken bison, which has all of the characteristics of standard bison leather with none of the stretch!
Well, that just about does it. Be sure to share your questions and your projects with us!
Buy Leather by the Piece v. by the Square Foot
Buying leather can be daunting, but it doesn’t have to be! The two most
common ways that leather is sold to crafters are by the square foot and by the piece.
There is a lot of discussion about which method is going to get you the most bang for your buck. While most distributors deal solely with selling pieces or pre-cuts, SLC also offers leather by the square foot. While none of these methods are bad, one tends to reign supreme depending on your needs.
So, like everything in the leather world, there isn’t one definitive answer, but there is a way to find out what’s best for you.
Kevin’s got some tips below!
Why buy leather that is priced by the square foot?
Well, a big reason is that you know what you’re paying for the leather
that you get. Most likely, you know that leather is a natural product that doesn’t come off the cow (or other animal) in 12 x 12 inch pieces.
Vendors have to buy it from tanneries in skins or sides that have been
measured by extremely accurate equipment.
Tanners have to measure
every single little bit of leather in a skin or side, in order to be able to
sell it and make a little profit. And a little profit is
what a tanner makes. Only about 3-4% – their money is
made on volume. The simplest way for a leather
vendor to sell leather to you would be just to turn around and sell you a whole
side or skin at a fixed price, with the price being based on an average number
of square feet in the sides. That way the vendor doesn’t have to have
experienced people that can measure, cut, change inventory, and take extra time
and work to sell to you.
That might be OK if you don’t mind
having your leather simply pulled from a pile, packed and shipped to
you. But what if you can’t afford, or don’t want/need a whole side of
6 oz. leather? If the vendor won’t cut the leather for you, and just
sell you what you need, you’re stuck. And for a small mom and pop
business, it could be the difference between taking on a new job or being without work.
Consider this example: Vendor “A” offers sides that average 17 to 20
square feet for $5.00 per square foot. Vendor “B” offers the basically the
same leather by the piece for $95.00, with the average footage being 17 to
20 sq ft.
Here’s the breakdown price-wise:
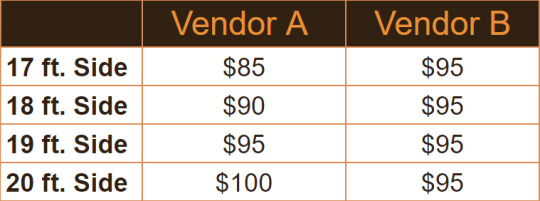
You
probably know that you’re not always going to get the largest side from
Vendor “B”, so most of the time your leather will cost more than buying
by the square foot. On the other hand, if you always get the
highest number of square feet advertised from vendor “B” you’ll save 5 bucks
every time.
This is why buying leather by the square foot is almost
always a better idea, especially with tooling leather.
When
you buy leather by the square foot, the vendor has the option of whether or not
he’s willing to sell you smaller quantities of leather. Now if you only need 7 sq ft, if the vendor is willing to sell you just that much, you’ll have to be willing to work with him a little bit by trusting his measuring methods. Which is why it is important to carefully choose whom you buy your leather from.
A vendor with your interests at
heart is probably going to try to send you just a little bit more
than you paid for. Granted, he might even ask you to pay a little
more than the normal square foot price, to account for possible loss because of
scrap, or reduction of sellability in the left over piece after cutting for
you. Those are just possibilities, and as you can imagine, you
would likely still be saving a considerable amount compared to buying leather by the piece. You’d only be spending money on the leather you need, rather than
spending money on leather that might not be used for some time.
Why buy leather that is priced by the piece?
Here are some
reasons:
- You can’t get it anywhere else.
- Because the leather is so stupidly cheap, that it actually pays do to so.
I’m sure there might be some other reasons, but they just don’t come to me at
the moment.
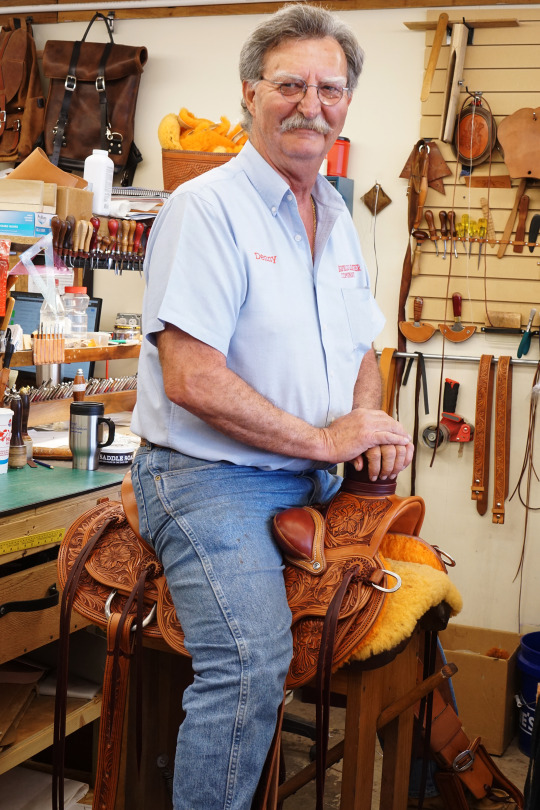
Making a Saddle with Denny Lowe
Purchasing a new saddle is expensive! Still, riders of all of ages will shell out what they need to get a quality saddle. That’s because saddles require a lot of time, energy and material to be made. Our resident master craftsman, Denny Lowe, spent a month making a saddle and we documented his process in a video! We realize that you might have some questions, so this post is a companion for that video with information on jargon used. Whether you are looking to make a saddle yourself or just educate yourself on saddles in general, we’ve got you covered!
Think of this has an active FAQ.
Please note that this is not intended to be a complete guide on making a saddle, but it can help you get started, refresh your memory on some aspects or at least familiarize yourself with the lingo well enough to get what you want out of a saddle commission.
First, if you’ve not watched the video, you can do that below. This roughly 30-minute video takes you through all of the basic steps of putting the saddle together. So, you won’t see any tooling or shape cutting. Just tacking, minimal sewing, shaping and trimming.
Now that you’ve seen the video, below you’ll find some additional information on vocabulary and what was used including the saddle tree, the materials and the tools.
Saddle Tree
A saddle tree is the foundation of the saddle. It is what guides the basic shape of the saddle and is the structure upon which the entire thing is built. SLC does not sell saddle trees. This is one of the more common questions we get. While we cannot endorse any one vendor over another, for this particular saddle, Denny used a 15.5 inch Wade Saddle Tree from Bowden Saddle Tree Company.
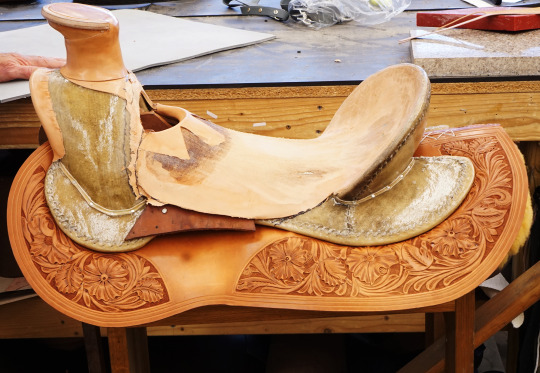
Oh and if you’re wondering what that saddle tree is sitting on, it’s called a Drawdown Stand. Denny says that many people make their own, but you can also easily find one for purchase online.
Tools
Many tools are used in the process of making a saddle. Here is a list of the essentials. Of course, every tool is not included and we have not listed stamps used for tooling. Denny does a lot of tooling with an adjustable swivel knife. With that basic tool and some patterns, the possibilities are endless.
Denny has an instructional video about getting started with tooling patterns. You can view our huge selection of stamping tools here for some ideas!
He also has custom tools he came up with by using his imagination. Test some things out on scrap leather you have – you just might surprise yourself!
Now, onto the list:
- Round Knife – used for cutting out all pieces, trimming and skiving.
- Straight Knife
- French Edger
- Safety Beveler
- Edge Bevelers (standard, varying sizes)
- Hammer (standard)
- Spikes (4) – used to hold pieces into place temporarily before nailing.
Leather
Perhaps the most essential part of a saddle is the material. Well, saddles are made from leather, but that’s not quite enough to get you started is it?
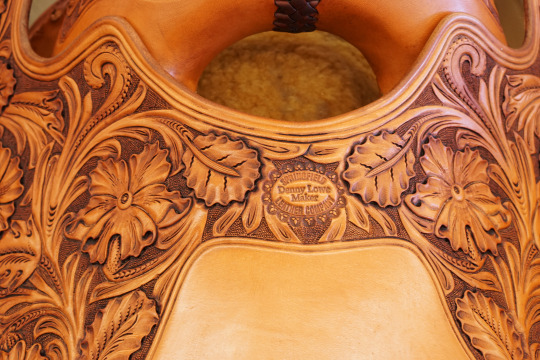
Denny exclusively uses Hermann Oak leather as the base for his saddles because of its superior quality, graceful aging and because it is ideal for tooling.
For this saddle, Denny used two sides of 11-13 oz. Hermann Oak Saddle Skirting, a full skin of Veg Tan Shearling Wool and ¼ – ½ side of Latigo leather in burgundy.
Hardware
The leather has to be held together somehow and sewing only goes so far. While many parts are put together with a needle and thread, there is plenty that is nailed down and some things are held together by hardware, like buckles.
For this saddle, Denny used standard one inch nails and nearly all stainless steel hardware because of its superior resistance to rust and its natural shine.
Finishing Supplies
Give your saddle color and shine with this simple duo. Denny finished his saddle using Fiebing’s Antique Finish in Sheridan Brown and Master’s Quick Shine.
Parts of a Saddle
Below is a graphic pointing out all of the parts of Denny’s saddle. Keep scrolling for a bit of information on each part.
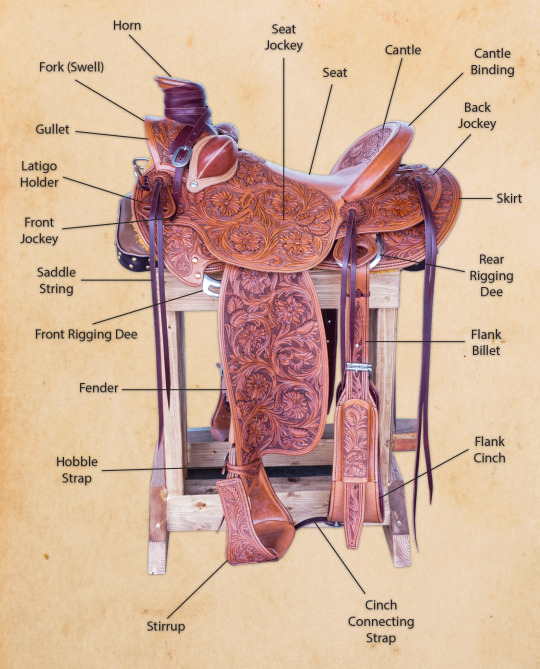
Horn — Culminating point of the fork; originally used for roping, but can be used as a grip.
Fork (Swell) —Provides a base for the horn and shapes the front of the saddle.
Jockeys —Placed on top of the saddle skirts; protects the rider’s legs from the friction of the rigging and the horse’s body.
Saddle Strings —Leather ties that can be used to secure additions to the saddle.
Fender —Positioned underneath the rider’s legs to protect the rider from the horse’s sweat.
Stirrup Hobble Strap —Positioned at the bottom of the fender and just before the stirrups, the hobble straps ensure that the rider does not catch their foot in the fender extension. The hobble straps also assist in holding the stirrups at the proper angle for ease and comfort of mounting and riding.
Saddle Tree —Frame and foundation for the saddle.
Stirrup— Hanging frame that holds the foot of the rider, supporting the rider in mounting and riding the horse.
Cinch Connecting Strap —Connects the front and flank cinches.
Flank Cinch —Assists in holding the back end of the saddle down.
Flank Billet —Connects the flank cinch to the rigging hardware.
Skirts —Large pieces secured underneath the saddle that protect the horse from the saddle hardware and protect the rider from the horse’s sweat.
Cantle —Portion that slopes up at the back of the seat; provides comfort and extra security for seated rider.
Seat —Holds and positions a sitting rider on the horse.
Gullet —"Tunnel" underneath the fork that provides space for the horse’s withers.
We hope that helped! If you have any questions that you didn’t see here (that isn’t about a step-by-step guide), feel free to “ask” us here or visit the contact page on our website!
Top Marks – Grading Veg Tan
Join Kevin for an in-depth discussion about vegetable tanned leather. He discusses vegetable tan quality and vegetable tan grading, plus a bit about the Springfield Leather way of classifying leather – it’s a great way to know what to expect!
Many newcomers and even some more experienced people in the leather world are confused when it comes to the grading and quality of leather. I thought I’d try to make a small effort to clear it up a bit….
When considering actual “quality” of leather, “A” grade, “B” grade, “C” grade, “D” grade, (and lower) are all the same when it comes to tooling and carving.
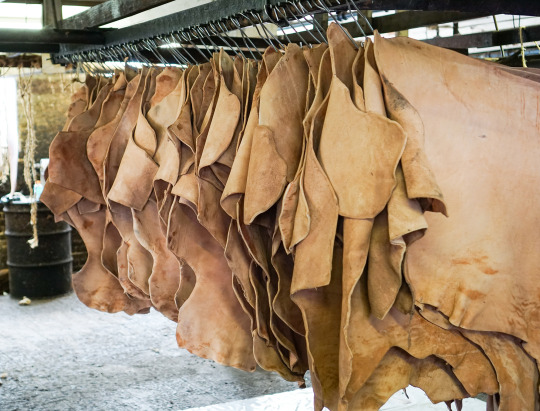
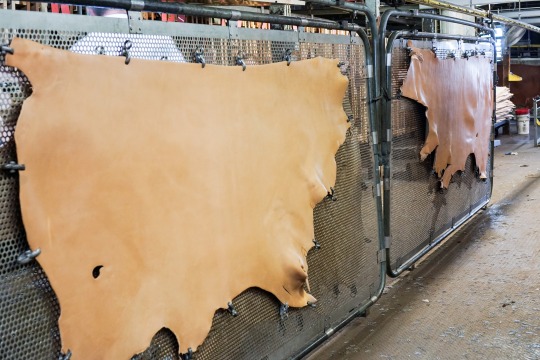
You see, when the tanner gets the hides in, they’re a bit nasty. They’re covered with salt, and hair and other things, and this prevents him from knowing what sort of hides he has. So, until the hides go through the dehairing and tanning process, he won’t know its quality. Once the hides come out of the tanning pits, then they have to be dried, ironed, split, rolled, and go through a host of other processes. In the case of Hermann Oak, since all the hides are tanned together in the same pits, the leathers that come out are all the same quality of tan. (By the way, Hermann Oak is the only one using the old pressed-yard tanning method, so tanning quality will likely vary more from other sources.)
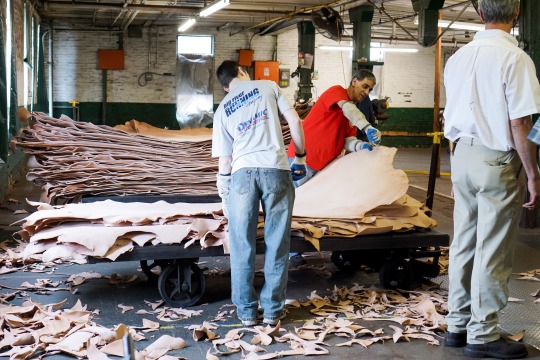
Trimming
After the skins go through myriad steps to become leather, they move on to the final stage: trimming and grading. At this point, all the sides are full weight, and pretty rough looking around the edges. Most veg tanners only use one or two people to do the grading and trimming of sides, so as to maintain maximum uniformity. We’ll talk about trimming first: Trimming is the act of cutting away all the little undesirable tatters and ugly areas around the outer edges of the side. The person that does this either saves the tanner lots of money, or costs them lots of money. He has to try to achieve a very delicate balance here…. He’s charged with making the side look good when it’s “set out”, while at the same time not removing any more valuable footage than absolutely necessary.
Keep in mind that tanners make money on volume of square feet processed. So, if the trimmer removes ½ a sq ft from 700 sides in a day, the tanner loses 350 sq ft per day. Let’s just say that his average cost for all leather in the tannery averages out to $4 per ft. Multiply that $4 by 26 production days in a month, and you get a very large number! So the more skilled the trimmer is, the more money the tanner makes! The less skilled the trimmer is, the more money the tanner loses!
Grading Criteria
Usually the trimmer and the grader are the same person. So, when the trimming is done, he begins the grading process.
The person doing the grading looks for cuts, open scratches, open scars, healed scars and brands, surface grain damage, soft spots on the back of the hide, stains, scud (leftover hair), machine damage, the depths of the “pockets” (armpit areas) and other various irregularities.
The bottom line is that the grader is primarily concerned with cosmetic issues. The grader obviously cannot see into the leather. He also is not going to wet a spot on the side, make a few cuts with a swivel knife, then bevel a little to see how it cuts or tools. Those things are not able to be detected by the tanner, or by us. One problem that can occur in the tanning process is when the tanning liquor does not fully penetrate an area of a skin. This is extremely rare, but can and will happen over time. As a vendor, all I can do is work with you on getting a piece of leather that doesn’t have a defect, of course, we won’t know until you try it out! Working together in these instances is all that we can do.
Grading Systems
Some tanners use A, B, C, D, x, xx, xxx to denote grades. Others use a number system. At SLC, we use a grading system that places “A” at the top of the quality scale as letter grading generally matches up to tannery grading systems like Hermann Oak. Lower grade sides will have more of those cosmetic issues we mentioned and higher grades will have less, but the leather itself is all the same quality.
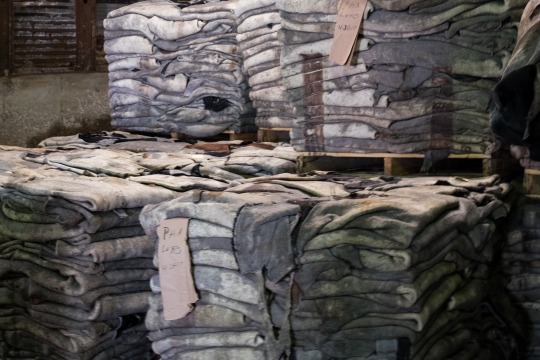
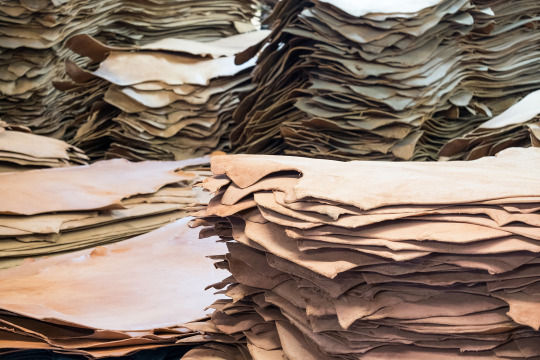
The tanner will get maybe 5-10 “A” grade hides out of 100. Maybe 20 or so “B” grades. The rest will be “C”s, and “D”s.
Something that most crafters are not aware of, is that to a tanner, an “A” grade side is simply the best grade of leather that is in the tannery at the moment. That’s why you can still find an occasional defect on an “A” grade side. So, if you order 50 sides of “A” grade from a tanner, you’ll get the best 50 that he has, even though some could have been “B”s in another run.
Buying by the Grade
For what it’s worth, we sell more lower grade Hermann Oak veg sides than all other grades combined. One reason is that most people realize that not only is it less expensive, but also they can cut around most cosmetic issues, or use them in a place where they won’t be seen or affect the integrity of their project. An example would be a knife sheath. You could put a piece with a scar on it on the inside of the sheath, and it would not be visible, or affect the quality of the sheath. On the other hand, if you need large areas that are very clean, then “B” grade sides would obviously be a better option. But here’s something to think about:
If you have a large D grade side that has a nasty brand as large as a man’s hand in the center of the butt area, and a hole large enough to push a volley ball thru around the shoulder, it would naturally be a lower grade side. But if there were no other defects, what do you think would be the grade of all the rest of the leather in that side? You guessed it…. “A” grade!
That’s also why, if for example, a customer ordered “D” grade leather from us but all we have in stock is “B” grade leather, we’ll send that customer “B” grade leather! The danger of course comes when the customer thinks that all “D” grade leather is as good as the “B” that he actually received. Normally we’d tell the customer about the swap, but sometimes things like that go unnoticed. Knowing the difference for yourself is always helpful.
All in all, considering what cowhides have to go through to become leather, I think we’re pretty fortunate that we even have leather! And now you know how quality of leather and grading of leather go together!
The bottom line: buy your leather from someone with experience that you trust and have a good feeling for, and be as reasonable with them as you want them to be with you.
– Kevin